Your first project in Microscope.ai is where your AI monitoring journey truly begins. A project serves as a container for all monitoring activities related to a specific brand, website, or business unit. This guide will walk you through creating your first project step by step.


Understanding Projects
Before creating your project, it's helpful to understand what a project represents in Microscope.ai.
What is a Project?
A project is a dedicated workspace within your organization that contains:
- Brand information - Details about the brand or business you're monitoring
- Website configuration - The website(s) being analyzed
- Product catalog - Products or services to monitor
- Prompts - Questions to ask AI models
- Analyses - Collections of prompts to run together
- Results - Historical data and insights from executions
Why Create Separate Projects?
Organizations typically create multiple projects to:
- Separate brands - Monitor different brands independently
- Segment markets - Track performance by geographic region or language
- Organize by business unit - Give each division its own monitoring space
- Test vs. production - Experiment with settings without affecting live monitoring
- Client separation - For agencies managing multiple clients
Before You Start
Gather the following information before creating your project:
Required Information
- Project name - A descriptive name (e.g., "Acme Corp - US Market")
- Brand name - The brand being monitored
- Website URL - Your primary website
- Industry - Your business sector
Optional but Recommended
- Brand description
- Target audience details
- Geographic focus
- Key products or services
- Main competitors
Step-by-Step Project Creation
Step 1: Access the Projects Page
- Log in to your Microscope.ai account
- From the left sidebar, click Projects
- You'll see your projects list (empty if this is your first)
- Click the New Project or Create Project button
Step 2: Enter Basic Project Information
The project creation wizard will guide you through several steps:
- Project Name - Give your project a clear, descriptive name
- Description (optional) - Add context about what this project monitors
- Click Next or Continue to proceed
Choose a project name that clearly identifies what you're monitoring. Good examples: "Nike - European Market", "TechCorp B2B SaaS", "Retail Brand - Holiday Campaign 2024".
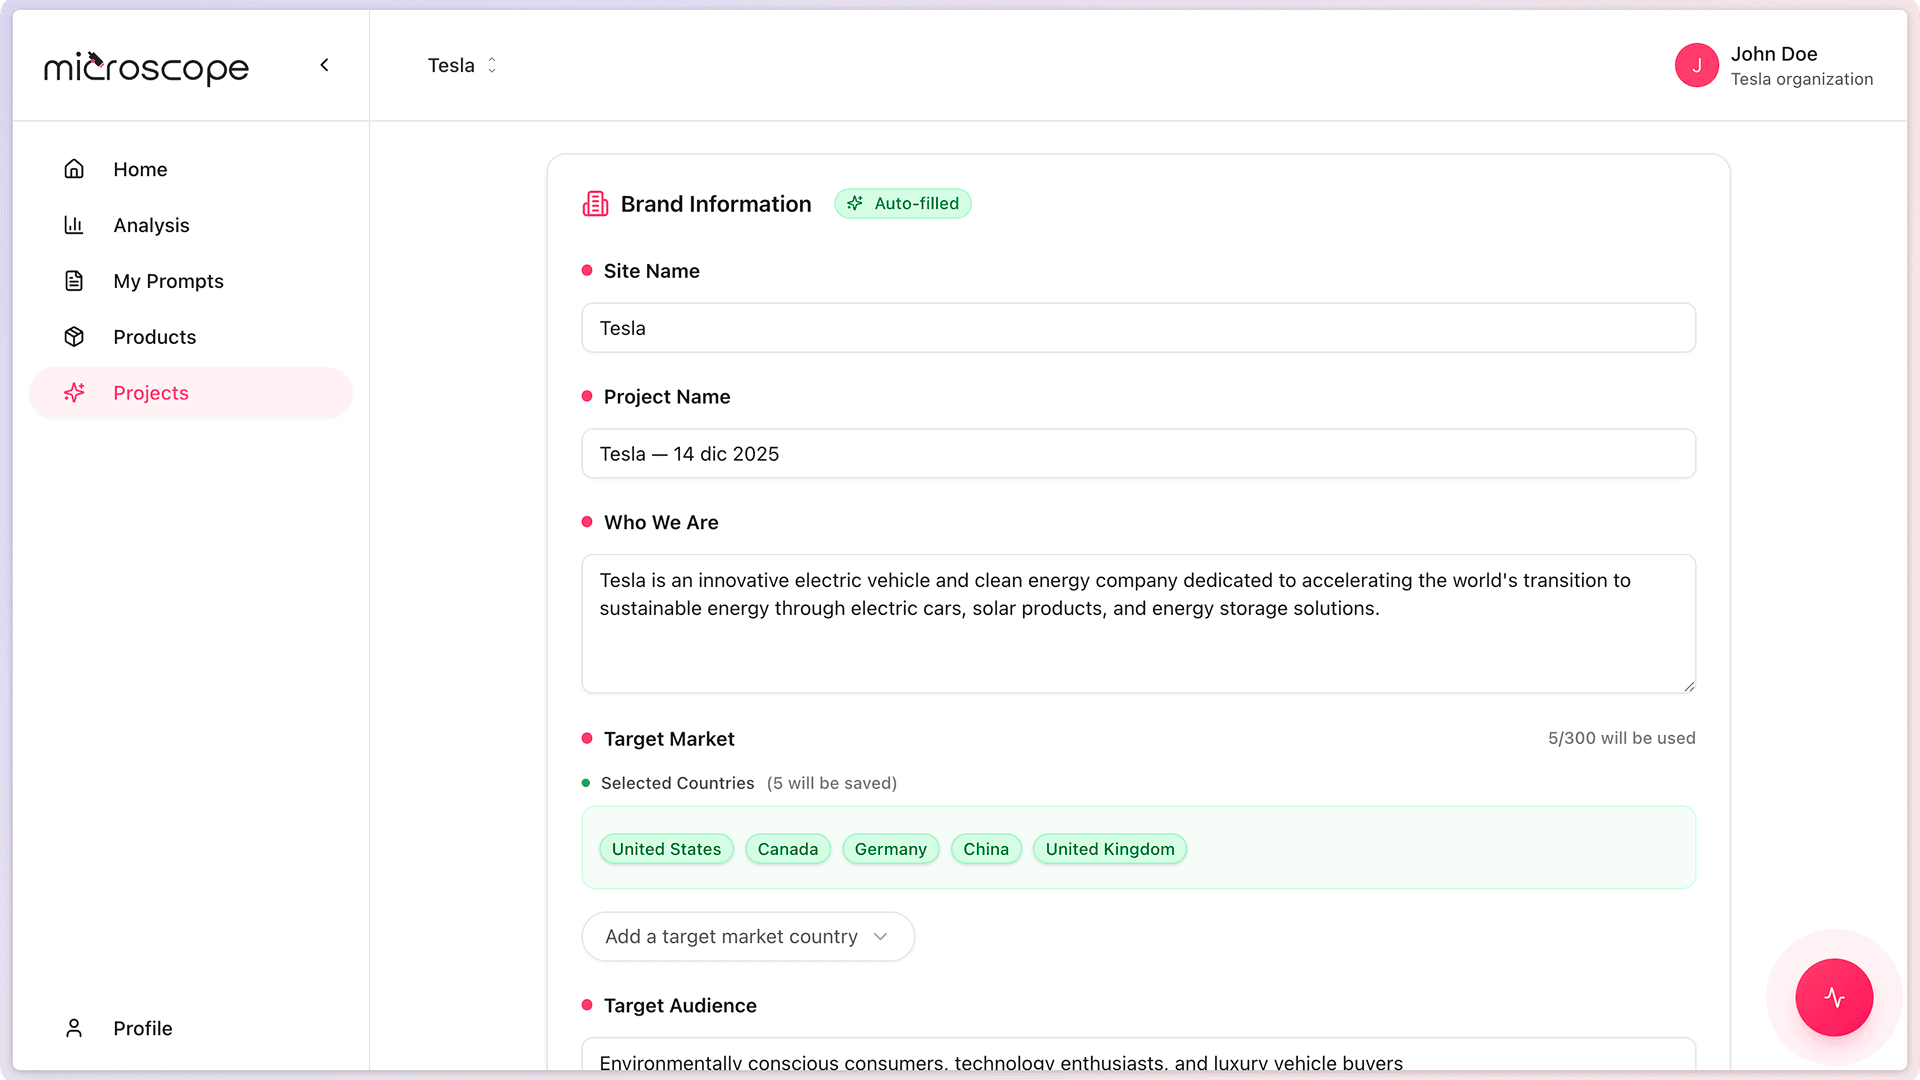
Step 3: Add Brand Information
Next, you'll configure your brand details:
- Brand Name - The name of the brand you're monitoring
- Brand Description - A brief overview of what your brand does
- Target Audience - Who your brand serves (optional)
- Click Next to continue
This information helps Microscope.ai understand your brand context when analyzing AI responses.
Step 4: Configure Your Website
Provide your website information:
- Website URL - Your primary website (e.g., https://www.example.com)
- Additional URLs - Other relevant domains or subdomains (optional)
- Click Next to proceed
Make sure to include the full URL including https:// for accurate monitoring.
Step 5: Select Your Industry
Choose the industry that best describes your business:
- E-commerce
- SaaS / Technology
- Healthcare
- Finance
- Education
- Travel & Hospitality
- Retail
- Manufacturing
- Professional Services
- Other
Industry selection helps Microscope.ai provide relevant automatic prompts and benchmarking.
Step 6: Review and Create
Before finalizing:
- Review all the information you've entered
- Make any necessary corrections
- Click Create Project to finalize
Your project will be created and you'll be redirected to the project dashboard.
After Creating Your Project
What Happens Next
Once your project is created:
- You'll land on the project dashboard (initially empty)
- The project becomes the active project - the one currently selected
- You'll see prompts to complete additional setup tasks
- Automatic prompts are generated based on your industry
- You can start adding products and creating analyses
The Project Dashboard
Your new project dashboard displays:
- Project name and details at the top
- Quick stats - Number of products, analyses, and recent executions
- Recent activity - Latest analyses and results (once you have data)
- Quick actions - Buttons to add products, create analyses, run executions
- Navigation - Links to products, prompts, and analyses sections
Recommended Next Steps
After creating your project, follow this recommended sequence:
- Add products - Build your product catalog to enable product-specific monitoring
- Review automatic prompts - Explore the pre-generated prompts for your industry
- Create custom prompts - Add prompts specific to your monitoring needs
- Create your first analysis - Select prompts and configure an analysis
- Run an execution - Get your first insights
- Review results - Understand how AI models represent your brand
Multiple Projects Strategy
When to Create Multiple Projects
Consider creating multiple projects when you need:
- Geographic separation - Different regions with different languages or markets
- Brand separation - Multiple brands in your portfolio
- Business unit separation - Different divisions or product lines
- Client separation - If you're an agency managing multiple clients
- Testing environment - Experiment without affecting production monitoring
Project Naming Conventions
For organizations with multiple projects, establish a naming convention:
- By brand and market: "Nike - North America", "Nike - Europe"
- By client: "Client: Acme Corp", "Client: GlobalTech"
- By product line: "Division: Consumer Electronics", "Division: Home Appliances"
- By environment: "Production - Main Brand", "Testing - Main Brand"
Project Limits
Understanding Your Plan Limits
Different subscription plans have different project limits:
- Trial - Up to 5 projects
- Focus - Up to 100 projects
- Magnify - Up to 300 projects
- Enterprise - Unlimited projects
What Happens When You Reach the Limit
If you've reached your plan's project limit:
- You'll see a message when trying to create a new project
- You can delete unused projects to free up slots
- You can upgrade your subscription plan
- Contact support for enterprise options
Switching Between Projects
Once you have multiple projects:
- Navigate to the Projects page
- Click on any project in the list to make it active
- The entire interface updates to show that project's data
- The active project name is displayed in the top navigation
Remember: projects are completely independent - data, analyses, and results don't mix between projects.
Common Issues and Solutions
Can't Create Project
If you can't create a project:
- Check plan limits - You may have reached your project quota
- Browser issues - Try refreshing the page or using a different browser
- Network problems - Check your internet connection
- Contact support - If issues persist after checking the above
Note: Currently all team members can create projects. Permission restrictions are planned for a future release.
Project Name Already Exists
If you see an error that the project name is taken:
- Choose a different, more specific name
- Add descriptive qualifiers (location, date, purpose)
- Check if a colleague already created this project
Invalid Website URL
If your website URL is rejected:
- Ensure you include https:// or http://
- Verify the URL is accessible and correct
- Avoid including paths or parameters - use the root domain
- Remove trailing slashes
Best Practices
- Be descriptive - Use clear, specific project names
- Plan your structure - Think about how you'll organize multiple projects
- Complete setup immediately - Add products and configure prompts right away
- Document your purpose - Use the description field to explain the project's goal
- Start simple - Your first project should be straightforward
- Test first - Run a quick analysis to verify everything is configured correctly
Next Steps
Now that you've created your first project, you're ready to:
- Learn about project configuration options
- Dive deeper into brand information setup
- Understand website configuration in detail
- Add products to your catalog
- Create and run your first analysis
Congratulations! Your project is the foundation for all your AI monitoring activities. Take time to configure it properly, and you'll benefit from more accurate and relevant insights.