Creating your first analysis is an exciting milestone in your AI monitoring journey. This guide will walk you through the entire process step by step.
Before You Begin
Prerequisites
- You have an active Microscope.ai account
- You have created and configured a project
- Your project has brand information and products (if applicable)
- You have reviewed the prompts library
What You'll Need to Decide
- Which prompts to include
- Which AI models to query
- Whether to run immediately or schedule
- How to name and describe your analysis
Step-by-Step: Create Your First Analysis
Step 1: Navigate to Project Analyses
- Log in to Microscope.ai
- Select your project
- Click Analysis in the left sidebar
- You'll see a list of existing analyses (if any)

Step 2: Start Creating a New Analysis
- Click the + New Analysis or Create Analysis button
- The analysis creation form will open
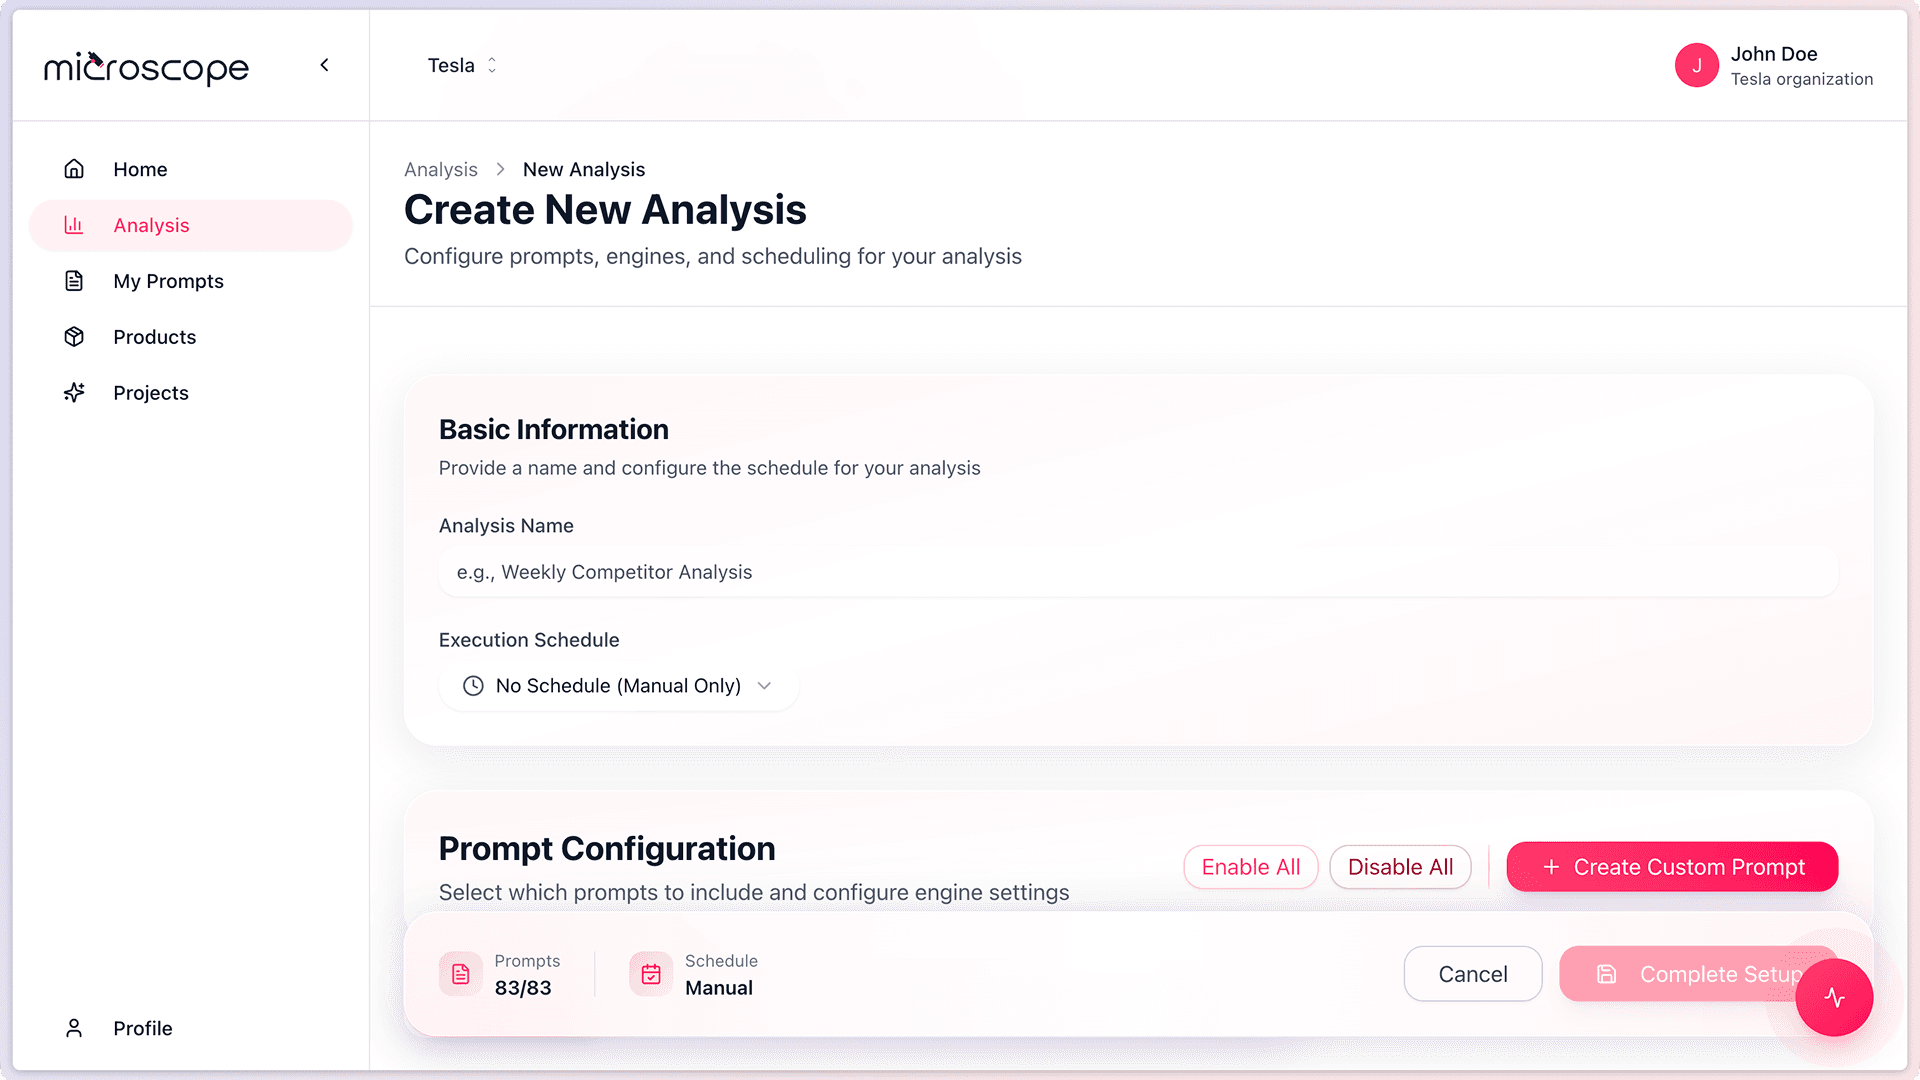
Step 3: Enter Basic Information
Analysis Name
- Enter a descriptive name
- Be specific about the purpose
- Examples: "Baseline Brand Monitoring", "Product Launch Q1 2024", "Competitive Analysis - Healthcare"
Execution Schedule
Options:
- No Schedule (Manual Only)
- Daily
- Weekly
- Monthly
Step 4: Select Prompts
This is the most important step. You'll choose which prompts to include.
Viewing Available Prompts
- The interface displays all prompts from your prompts library
- Prompts are organized by category or type
Selection Strategies for Your First Analysis
Option A: Comprehensive Baseline (Recommended for first analysis)
- Select all or most automatic prompts
- Include at least a few from each category
- Provides a complete picture of your AI presence
Option B: Focused Analysis
- Choose prompts from one category (e.g., Brand or Product)
- Select 10-15 related prompts
- Good for targeted monitoring or specific campaigns
How to Select Prompts
- Check the box next to each prompt you want to include
- Or use "Select All" if starting with all prompts
- Deselect any prompts not relevant to your current goal
- Review your selections before proceeding
For your first analysis, we recommend starting with a comprehensive baseline to understand your overall AI presence before focusing on specific areas.
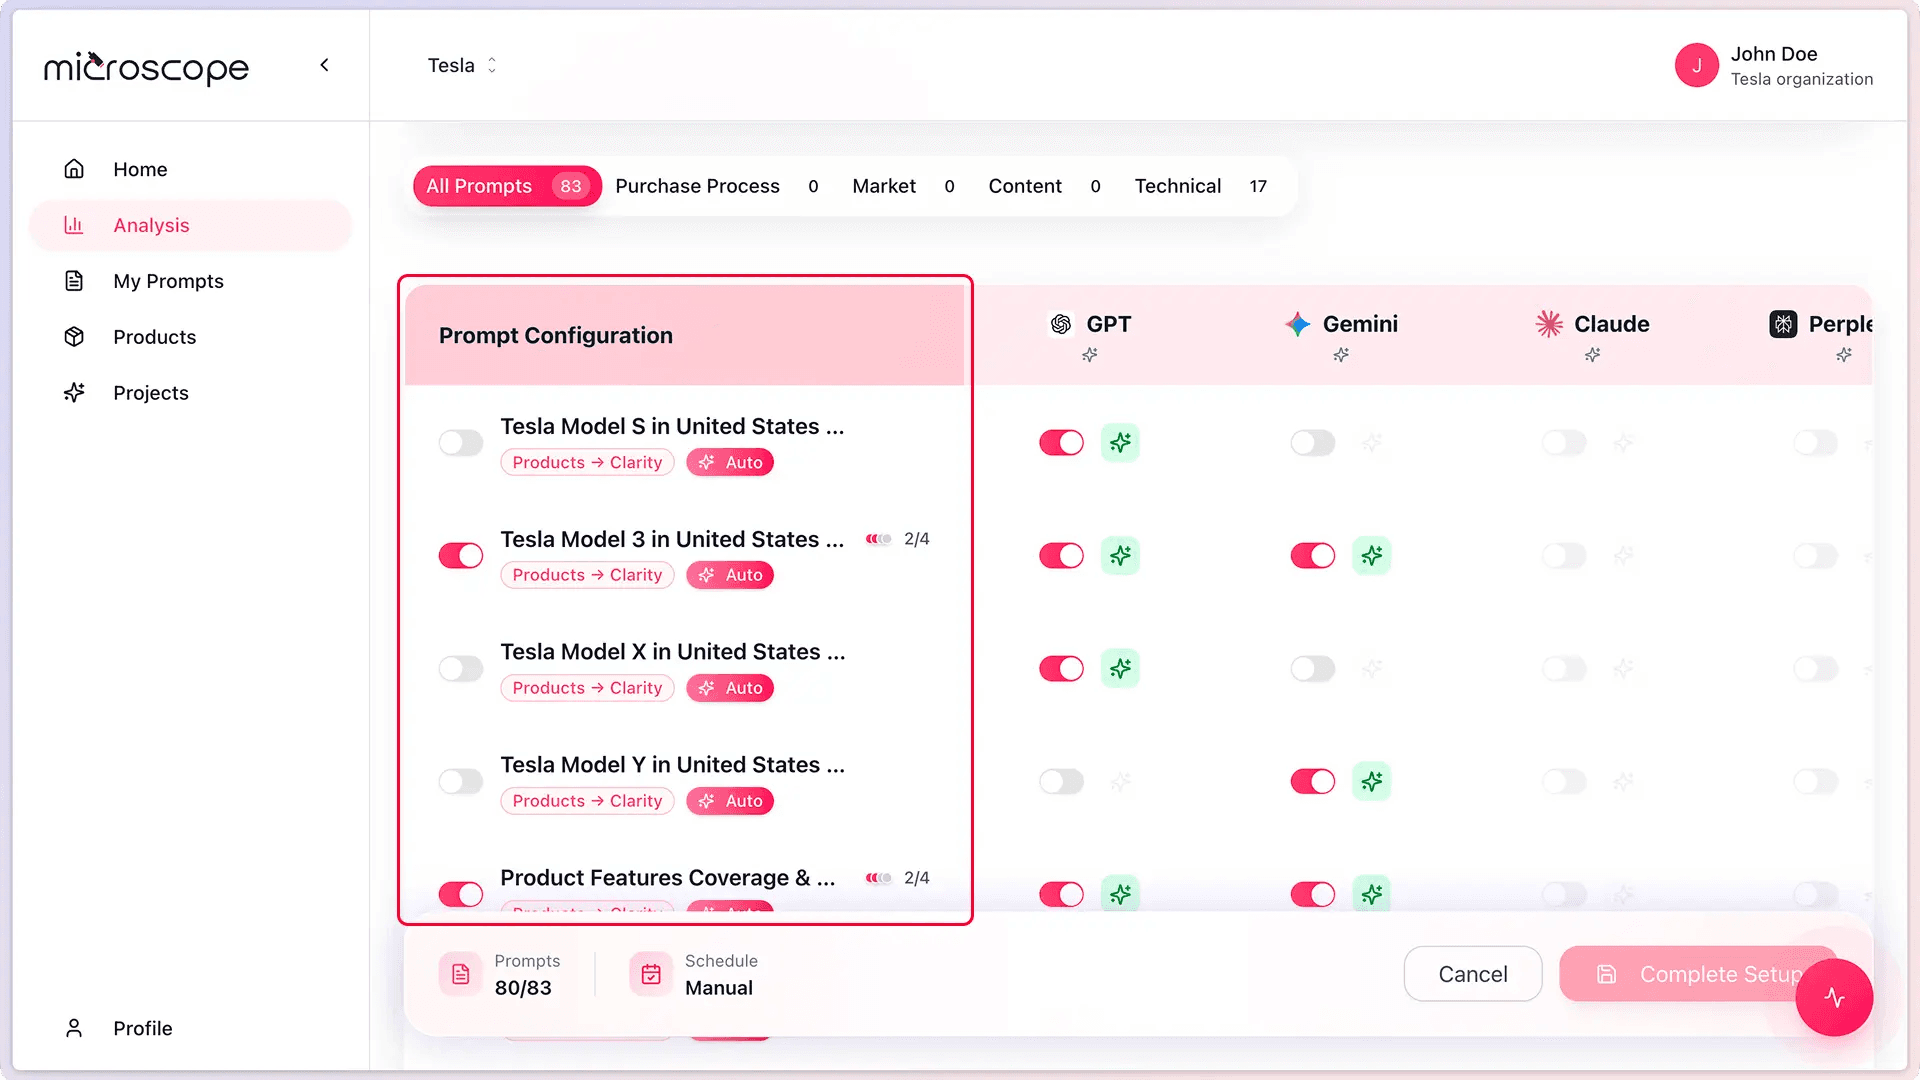
Step 5: Choose AI Models
Select which AI models to query with your prompts.
Available AI Models
- GPT (OpenAI) - ChatGPT models
- Gemini (Google) - Google AI models
- Claude (Anthropic) - Claude models
- Perplexity AI - Perplexity search models
Selection Considerations
- More models = more comprehensive insights but higher usage cost
- Recommended for first analysis: Select all available models
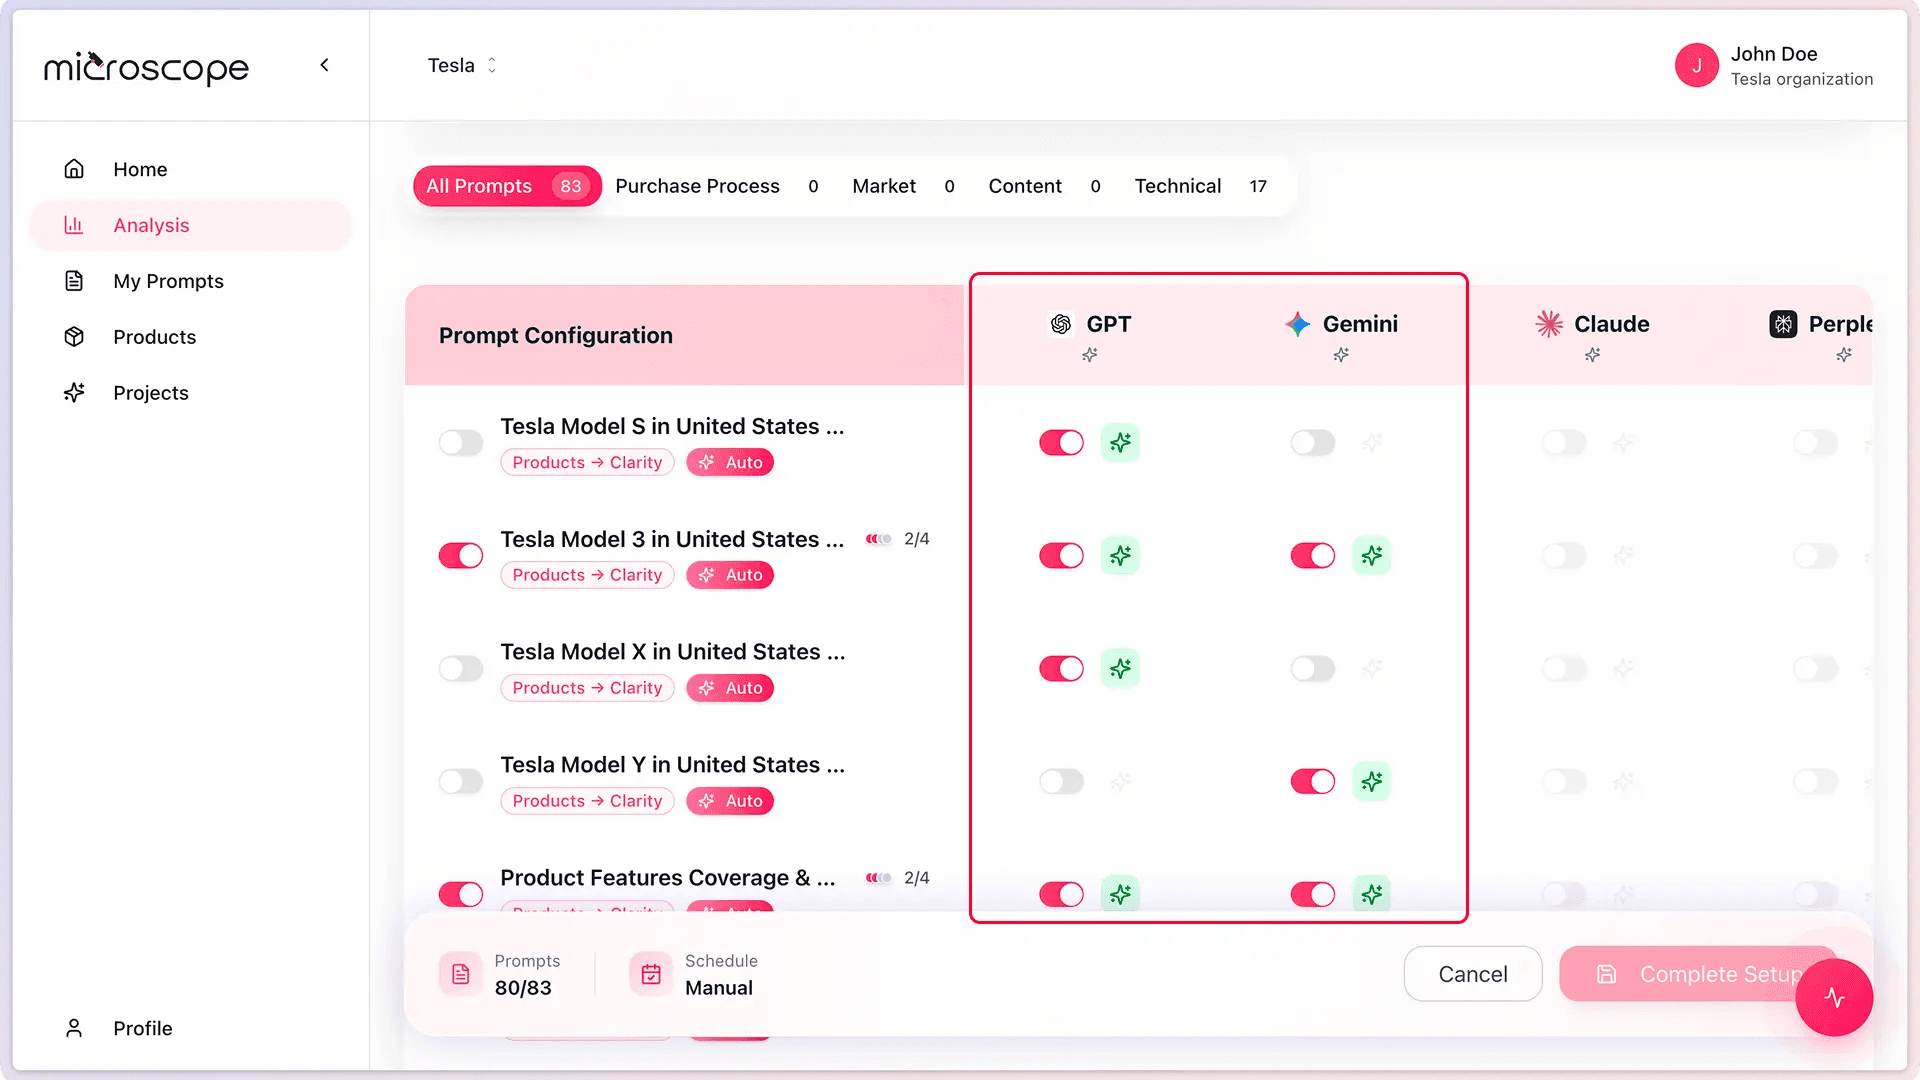
- This provides the most complete picture
- You can focus on specific models in future analyses
For more details on model selection, see Selecting Prompts and Models
Step 6: Create the Analysis
- Click Complete Setup button
- The analysis is created and saved
- You'll be redirected to the Project Analyses
- Find your analysis in the list
First Analysis Best Practices
Start Broad
- Include all categories
- Query all AI models
- Use mostly automatic prompts
- Get a comprehensive baseline
Common Mistakes to Avoid
- Too few prompts - Less than 10 prompts may not provide enough insight
- Only one category - Limits your understanding
- Only one AI model - Doesn't show the full picture
- Vague name - Makes it hard to find or remember later
Troubleshooting
Analysis Won't Create
- Check that you've selected at least one prompt
- Ensure at least one AI model is selected
- Check for required fields
Next Steps
Congratulations on creating your first analysis! Now you're ready to:
- Running an Analysis
- Aprenda a interpretar los resultados del análisis
- Explore scheduling and automation options
- Create more targeted analyses
- Set up recurring monitoring